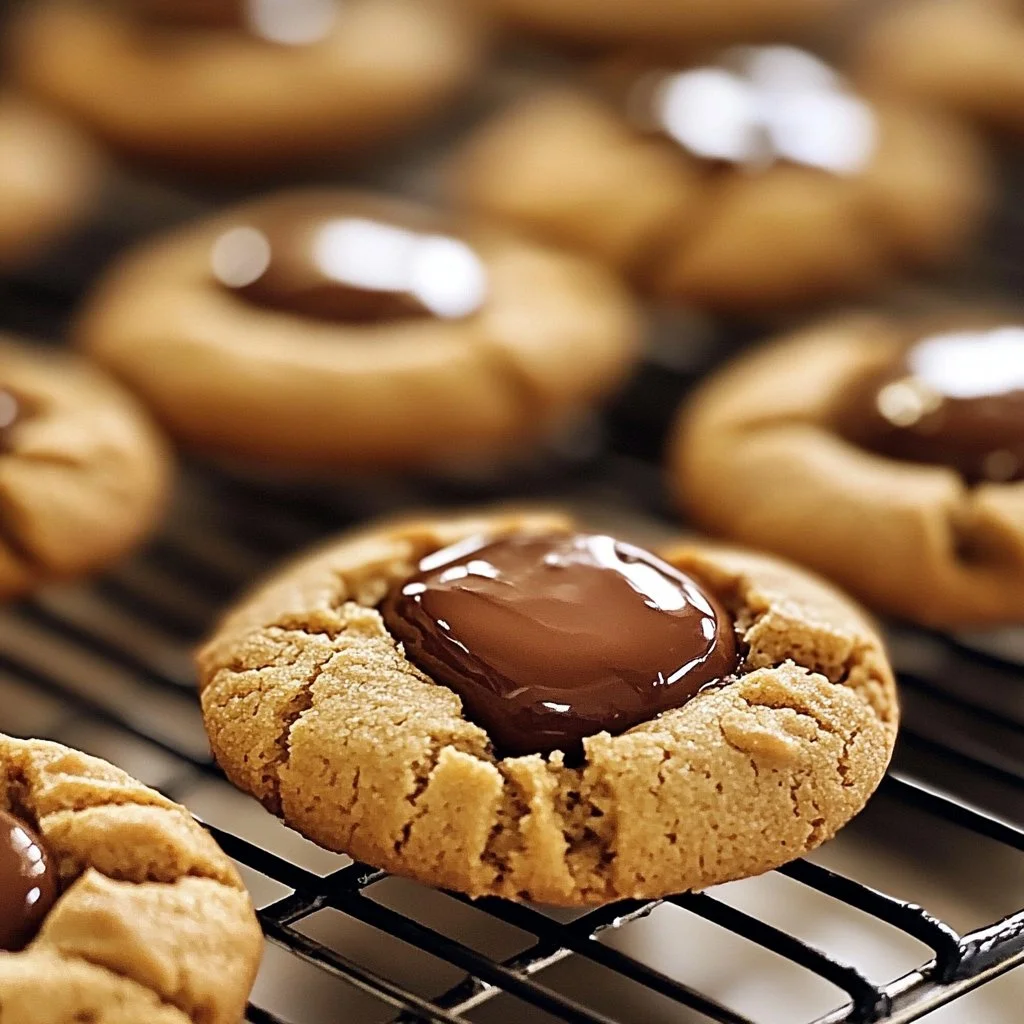
Classic Peanut Butter Blossoms have a special place in my heart, and I’m sure they will find a home in yours too. There’s just something magical about the combination of creamy peanut butter and chocolate that makes these cookies a hit at any event, be it a holiday gathering, a weeknight treat, or just a cozy afternoon at home. The delightful contrast of textures—the crinkle of a soft cookie and the smooth melt of a Hershey’s Kiss—creates a moment of pure joy with every bite.
Reasons to Try It
Why make these beloved cookies? For starters, Peanut Butter Blossoms are incredibly easy to whip up and don’t require any exotic ingredients. They’re budget-friendly, which is perfect when you want to indulge without breaking the bank. Plus, they’re a guaranteed crowd-pleaser—a true favorite among kids and adults alike. Whether you’re baking for a festive occasion or simply want a delicious snack to share with family, this recipe fits the bill beautifully.
“These Peanut Butter Blossoms are my go-to for holiday baking! Soft, sweet, and just the right amount of chocolate—my family can’t get enough!” – Sarah M.
Preparing Classic Peanut Butter Blossoms
Ready to dive in? Making your own Classic Peanut Butter Blossoms is straightforward and straightforward. You’ll start by mixing your dry ingredients, follow with a few simple steps to create a smooth dough, and then chill it before baking. The result is a batch of beautiful, blooming cookies ready to be the star of your dessert table.
What You’ll Need
Here’s everything you’ll need for baking Classic Peanut Butter Blossoms:
- 1 3/4 cup All-Purpose Flour
- 1 tsp Baking Soda
- 1/2 tsp Salt
- 1/2 cup Creamy Peanut Butter
- 1/2 cup Unsalted Butter (room temperature)
- 1/2 cup Granulated Sugar
- 1/2 cup Light Brown Sugar (lightly packed)
- 1 Large Egg
- 2 tbsp Milk
- 1 tsp Vanilla Extract
- 1/2 cup Granulated Sugar (additional for coating the cookies)
- 11 oz Bag of Hershey Kisses
Feel free to swap creamy peanut butter for crunchy if you’re after an extra texture, or use dark chocolate Kisses for a richer flavor profile.
Step-by-Step Instructions
Let’s get baking! Follow these easy-to-understand steps for perfect Peanut Butter Blossoms every time.
-
Start by whisking together the flour, baking soda, and salt in a medium bowl. Set this mixture aside.
-
In a separate mixing bowl, cream together the peanut butter, unsalted butter, granulated sugar, and light brown sugar on medium-high speed until the mixture is smooth.
-
Beat in the egg, milk, and vanilla extract, making sure to scrape down the bowl sides as needed.
-
Gradually incorporate the dry ingredients until the dough is just combined.
-
Cover the dough and chill it in the refrigerator for at least 1 hour.
-
Preheat your oven to 375°F (190°C) while the dough is chilling. Line your baking sheets with parchment paper.
-
Form the chilled dough into 1-inch balls, roll them in granulated sugar, and space them about 1.5 to 2 inches apart on the lined baking sheets.
-
Bake the cookies for 7-8 minutes. Immediately press a Hershey’s Kiss into the center of each cookie and return to the oven for an additional 2 minutes.
-
Let the cookies cool on the baking sheet for 5-10 minutes before transferring them to a cooling rack.
-
Store any leftovers in an airtight container with a slice of bread to maintain freshness for up to a week.

Best Ways to Enjoy It
These classic cookies can be enjoyed in a multitude of ways. Serve them warm with a glass of cold milk for the ultimate pairing! For a more festive touch, try adding a sprinkle of sea salt or drizzling melted chocolate over the cooled cookies. They also make fantastic gifts when packaged neatly in a decorative box.
How to Store
To keep your Peanut Butter Blossoms fresh and delicious, store them in an airtight container at room temperature. For added freshness, include a slice of bread to absorb moisture. These cookies will stay tasty for up to a week. If you want to keep them longer, they can be frozen for up to three months. Just make sure to mark the date before sealing them in a freezer-safe container!
Helpful Cooking Tips
Here are some tips to help you perfectly execute this delightful cookie recipe:
- Ensure that your butter is at room temperature to integrate smoothly with the peanut butter and sugars.
- Chilling the dough is a crucial step—it prevents the cookies from spreading too much during baking.
- If you’re short on time, you can skip the chill for a slightly different texture, though I highly recommend not to!
Creative Twists
Feel like mixing things up? Here are some fun variations to consider:
- Nutty Additions: Mix in some chopped peanuts or walnuts for added crunch.
- More Chocolaty: Replace the Hershey’s Kisses with chocolate chips and sandwich two cookies together with peanut butter in the middle.
- Dietary Swaps: Swap out regular flour for almond or oat flour for a gluten-free option, or use a sugar substitute to reduce the sweetness.
Your Questions Answered
What is the prep time for Classic Peanut Butter Blossoms?
Prep time usually takes about 20 minutes, but allow an additional hour for chilling the dough.
Can I use natural peanut butter in this recipe?
Yes, but natural peanut butter may produce a slightly different texture. Ensure it’s well-stirred and not overly oily.
How long do these cookies last?
Stored in an airtight container, they can last up to a week. You can freeze them for up to three months if sealed properly.
Baking Classic Peanut Butter Blossoms is more than just making cookies; it’s about creating memories around the kitchen. So gather your ingredients, preheat that oven, and let’s start baking!

Peanut Butter Blossoms
Ingredients
Method
- Whisk together the flour, baking soda, and salt in a medium bowl. Set this mixture aside.
- In a separate mixing bowl, cream together the peanut butter, unsalted butter, granulated sugar, and light brown sugar on medium-high speed until smooth.
- Beat in the egg, milk, and vanilla extract, scraping down the bowl sides as needed.
- Gradually incorporate the dry ingredients until the dough is just combined.
- Cover the dough and chill it in the refrigerator for at least 1 hour.
- Preheat your oven to 375°F (190°C) while the dough is chilling. Line your baking sheets with parchment paper.
- Form the chilled dough into 1-inch balls, roll them in granulated sugar, and space them about 1.5 to 2 inches apart on the lined baking sheets.
- Bake the cookies for 7-8 minutes. Immediately press a Hershey's Kiss into the center of each cookie and return to the oven for an additional 2 minutes.
- Let the cookies cool on the baking sheet for 5-10 minutes before transferring them to a cooling rack.